


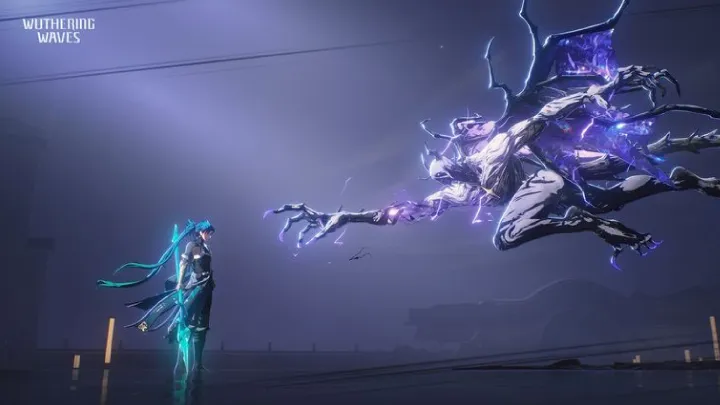
Welcome, Rover, to the world of Solaris-3. Wuthering Waves is not merely an action RPG; it is a meticulously crafted kinetic combat system layered onto an expansive, post-apocalyptic open world. Success in this unforgiving landscape, desolated by the Lament, demands more than just brute force. It requires a profound understanding of rotation synergy, resource efficiency, and the highly strategic Echo system.
This guide is designed for the discerning player—the one who seeks to elevate their gameplay from button-mashing to a fluid, high-skill "battle concerto." We will move beyond the basic tutorials to delve into the core mechanics that define mastery in the game.
I. The Pillar of Progression: Strategic Resource Management
As a free-to-play (F2P) friendly title with a gacha element, your ability to progress hinges entirely on efficient resource allocation, specifically Waveplates and Currency.
1. Waveplate Efficiency and Time Gating
Waveplates (the game's energy system) are the most critical time-gated resource. You must use them judiciously to avoid stalling your progression.
- Prioritize Leveling Materials: In the early to mid-game, your Waveplates should be almost exclusively spent on EXP Materials (for both Resonators and weapons) and Skill Upgrade Materials. The single greatest damage increase comes from increasing your Resonators' levels and talent ranks.
- The Tacet Field Exception (Echo Grinding): While Echoes are crucial, grinding them aggressively with Waveplates in the early game is inefficient. Their final forms and highest drop rates are tied to your Union Level (Account Rank). Until you reach the maximum or near-maximum Union Level (often called the end-game equilibrium), use Waveplates for Echoes sparingly, only to cap the main pieces for your primary damage dealer (DPS).
- Weekly Bosses: Always reserve enough Waveplates to complete your weekly boss challenges, as these drop unique materials required for the highest tier of Skill upgrades. Never let these resets pass.
2. The Gacha Strategy: Prudence Over Impulse
Your Astrites (premium currency) and Forte Circuit (Resonator skill tree) investments must be targeted.
- The 5-Star Rule: As an F2P or light spender, focus your pulls entirely on the Limited Character Banner. The standard banner offers diminishing returns. Only pull for a 5-star Resonator who is an unambiguous damage dealer or a high-impact support unit (like an aura buffer or a top-tier healer).
- Weapon vs. Character: Generally, prioritize the Resonator over their 5-star signature Weapon. A well-built 4-star weapon on a 5-star character is often more valuable than a 5-star weapon on a mediocre 4-star character. Only pull on the weapon banner if you have secured the character and have surplus currency, or if the featured weapon is a best-in-slot option for two or more characters you frequently use.
- Forte Circuit (Talents): Maxing out a few key talents for your main DPS is a higher priority than leveling all talents equally. Focus on the DPS's Resonance Skill and Basic Attack/Forte Circuit, as these are the primary damage sources in a rotation.
II. Combat Mastery: The Synergy of the Switch
The fundamental difference between a novice and an expert in Wuthering Waves is the seamless execution of the Intro/Outro Skill rotation, driven by Concerto Energy.
1. Understanding Concerto Energy and Rotation Flow
Concerto Energy is the resource built up by attacking that enables the powerful Intro/Outro Skill (QTE) tag-in/out. The goal of an elite team is to maintain a near-continuous loop of these skills.
- The Core Rotation:
- Start with Buffer/Sub-DPS: Tag in your secondary character (the buffer/sub-DPS). They trigger their Intro Skill (which often grants a buff to the team).
- Apply Buffs/Damage: Use their Resonance Skill and basic attacks to build up Concerto Energy and apply their specific buffs or debuffs.
- Outro to Main DPS: As soon as the Concerto Energy is full or their primary buff window is ending, switch them out. They execute their powerful Outro Skill (e.g., an elemental damage burst or a large attack buff).
- Main DPS Entry: Your main DPS tags in, immediately benefiting from the newly applied Outro Skill buff via their own Intro Skill.
- Damage Window: The DPS uses their full kit—Resonance Liberation (Ultimate), Resonance Skill, and Forte Circuit combos—during the limited-time buff window.
- Repeat: Switch back out to the buffer/sub-DPS to start generating Concerto Energy for the next rotation.
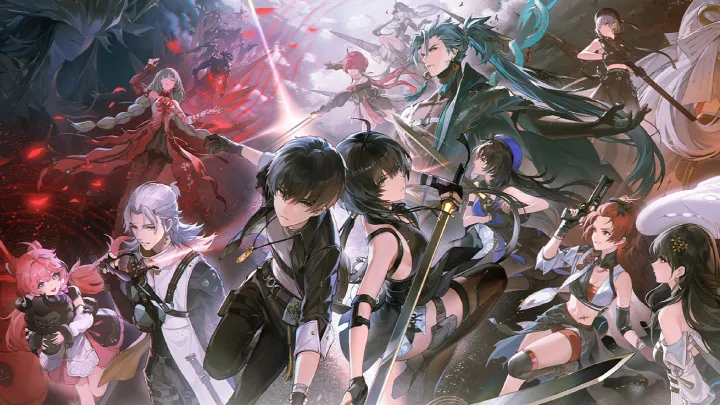
- The Three-Character Composition: Master teambuilding by classifying your Resonators:
- Main DPS: High on-field damage, short burst window (e.g., Calcharo, Jiyan).
- Sub-DPS/Buffer: Quick utility application, high Off-field damage, strong Outro Skill (e.g., Sanhua, Mortefi).
- Healer/Support: Utility, healing, and usually a high-impact Outro Skill (e.g., Verina).
2. Advanced Defensive Mechanics
The defensive mechanics in Wuthering Waves are offensive tools that reward precision.
- Perfect Dodge Counter: Executing a Dodge just before an enemy attack lands is not just defensive; it often triggers a visual flash and allows for an immediate, enhanced counterattack (by pressing the basic attack button). This counter deals significant damage, quickly fills your Energy meters, and rapidly depletes the enemy’s Vibration Strength.
- Parry (Counterattack): Some enemy attacks glow gold, indicating they can be perfectly parried by a specific character skill or the Rover's counter mechanic. A successful Parry completely negates the attack, deals massive stagger damage, and often gives you a window for a full DPS combo. Mastering the timing of these golden flashes is non-negotiable for high-level boss fights.
III. The Echo System: The Ultimate Gear Check
The Echo system is the endgame grinding sink and the ultimate determinant of character power. It is a dual system of stat optimization and active ability deployment.
1. The Strategic Echo Build
Echoes function as five equipable gear slots, each with a specific cost and main stat pool.
- Echo Cost Allocation: You are limited to a total of 12 Cost across your five slots. The standard, optimized distribution for a DPS is: (1) 4-Cost, (2) 3-Cost, (2) 1-Cost.
- 4-Cost (Main Stat: Crit Rate/DMG or Elemental DMG): Reserved for the highest impact main stat, usually a Crit or Elemental bonus.
- 3-Cost (Main Stat: ATK%): Essential for providing the flat damage scaling all characters need.
- 1-Cost (Main Stat: Utility/ATK%): Used to fill out the set bonus and provide minor stat boosts.
- Set Bonuses: Prioritize the 5-piece elemental damage set corresponding to your main DPS's element (e.g., Molten Rift for Fusion damage). For supports and Sub-DPS, prioritize utility sets like Rejuvenating Glow (healing/support) or Moonlight Cloud (Energy Regeneration).
2. Echo Skill and Sub-Stat Farming
This is where the real grind begins.
- The 4-Cost First Slot (Active Echo Skill): The Echo you place in the 4-Cost slot determines the Active Echo Skill you can use in combat (e.g., summoning a giant boss attack). Choosing the right 4-Cost Echo is crucial for utility (crowd control, healing) or damage (burst).
- Sub-Stat Priority: The hunt for perfect sub-stats is endless. For a DPS, you must prioritize Crit Rate, Crit DMG, and ATK% above all others. For supports, seek Energy Recharge and specific utility stats. A perfect Echo is defined less by its main stat (which is fixed by the slot) and more by the quality of its four sub-stats.
IV. Overworld and Community Engagement
Wuthering Waves provides several mechanisms for exploration and late-game rewards.
1. High-Freedom Traversal as a Mechanic
The traversal tools (grappling hook, wall dash, glider) are not merely travel tools; they are integrated into puzzle-solving and combat.
- Stamina Conservation: Learn to cancel or chain traversal moves to bypass stamina consumption for long-distance travel. The grappling hook, in particular, is extremely useful for repositioning quickly in combat or escaping a tight spot in the open world.
- Hidden Collectibles: The vast map is littered with collectibles and resources (chests, puzzles). These often reward Astrites and Union EXP, providing a critical boost to your early-game summoning potential and rank progression. Make world exploration a priority over repetitive grinding initially.
2. Tower of Adversity and Boss Preparation
The Tower of Adversity is the main combat test that requires multiple, optimized teams.
- Vertical Investment: The common mistake is spreading resources thin across many characters. Instead, "Hyper-Invest" in one top-tier DPS and one top-tier support/healer first. This duo can carry a weak third character through most of the early and mid-game content.
- Learning the Bosses: Bosses in the Tactical Hologram mode or the weekly challenges have distinct movesets and Vibration Strength (stagger) mechanics. Dedicate time to practicing parry/dodge windows against these bosses. An expert player knows a boss's attack pattern so well that they can maintain a near-perfect offensive rotation while entirely avoiding damage.
By focusing your attention on these four pillars—efficient resource allocation, the seamless flow of the Intro/Outro combat system, strategic Echo configuration, and maximized world traversal—you will not just play Wuthering Waves; you will become a master Resonator, ready to conquer the challenges of the Lament.